目录
-
下载Anaconda
-
安装
-
使用Anaconda
-
配置jupyter支持远程访问
-
配置jupyter使用密码访问
-
后台运行jupyter
前言
已经有超过三人像我反应使用网上的教程Anaconda有问题,有的装不了,有的装的直接整的自己yum命令用不了,linux服务器都被整费。为此我给大家写的简单的安装教程,避免大家可能踩的坑。
1. 下载Anaconda
清华源:
https://mirrors.tuna.tsinghua.edu.cn/anaconda/archive
官网:
https://repo.anaconda.com/archive/
经过无数次的实践证明,python3.6版本是最稳定的,另外我的linux服务器是64位,为了更快的性能,所以我选择下载64位,所以最终我通过以下命令,直接在linux服务器上下载:
wget https://mirrors.tuna.tsinghua.edu.cn/anaconda/archive/Anaconda3-5.2.0-Linux-x86_64.sh
2. 安装
执行:
sh Anaconda3-5.2.0-Linux-x86_64.sh
Please, press ENTER to continue
[root@VM_0_9_centos ~]# sh Anaconda3-5.2.0-Linux-x86_64.sh
Welcome to Anaconda3 5.2.0
In order to continue the installation process, please review the license
agreement.
Please, press ENTER to continue
>>>
===================================
Anaconda End User License Agreement
===================================
...
先直接回车,再按q。
询问是否同意协议,填yes。
Do you accept the license terms? [yes|no]
[no] >>> yes
选择安装位置,直接回车就安装在当前路径,我选择安装在/opt/anaconda3目录下。
Anaconda3 will now be installed into this location:
/root/anaconda3

  - Press ENTER to confirm the location
  - Press CTRL-C to abort the installation
  - Or specify a different location below

[/root/anaconda3] >>> /opt/anaconda3
PREFIX=/opt/anaconda3

installing: python-3.6.5-hc3d631a_2 ...
Python 3.6.5 :: Anaconda, Inc.
installing: blas-1.0-mkl ...
installing: ca-certificates-2018.03.07-0 ...
installing: conda-env-2.6.0-h36134e3_1 ...
installing: intel-openmp-2018.0.0-8 ...
...
installing: seaborn-0.8.1-py36hfad7ec4_0 ...
installing: anaconda-5.2.0-py36_3 ...
installation finished.
经过几分钟的等待后,主程序安装完成。询问是否将Anaconda3加入到环境变量,直接回车表示no,不添加。
Do you wish the installer to prepend the Anaconda3 install location
to PATH in your /root/.bashrc ? [yes|no]
[no] >>>
You may wish to edit your .bashrc to prepend the Anaconda3 install location to PATH:
export PATH=/opt/anaconda3/bin:$PATH
Thank you for installing Anaconda3!
然后询问是否安装VSCode,填no并回车,表示不安装。
Do you wish to proceed with the installation of Microsoft VSCode? [yes|no]
>>> no
此时安装程序已经结束,然后我们执行:
echo ". /opt/anaconda3/etc/profile.d/conda.sh" >> ~/.bashrc
sudo ln -s /opt/anaconda3/etc/profile.d/conda.sh /etc/profile.d/conda.sh
注意:/opt/anaconda3换成你所安装的位置。
3. 使用Anaconda
退出shell后,重新登陆,然后就可以使用anaconda了。
进入环境:conda activate
退出环境:conda deactivate
[root@VM_0_9_centos ~]# conda activate
(base) [root@VM_0_9_centos ~]# python
Python 3.6.5 |Anaconda, Inc.| (default, Apr 29 2018, 16:14:56)
[GCC 7.2.0] on linux
Type "help", "copyright", "credits" or "license" for more information.
>>> exit()
(base) [root@VM_0_9_centos ~]# conda deactivate
[root@VM_0_9_centos ~]# python
Python 2.7.5 (default, Jun 20 2019, 20:27:34)
[GCC 4.8.5 20150623 (Red Hat 4.8.5-36)] on linux2
Type "help", "copyright", "credits" or "license" for more information.
>>> exit()
[root@VM_0_9_centos ~]#
4. 配置jupyter支持远程访问
生成jupyter默认配置:
jupyter notebook --generate-config
(base) [root@VM_0_9_centos ipython]# jupyter notebook --generate-config
Writing default config to: /root/.jupyter/jupyter_notebook_config.py
修改配置:
(base) [root@VM_0_9_centos ipython]# vi ~/.jupyter/jupyter_notebook_config.py
取消c.NotebookApp.ip='localhost'的注释。
并改成c.NotebookApp.ip='*'即可。
运行jupyter:
jupyter notebook --allow-root
效果如下:
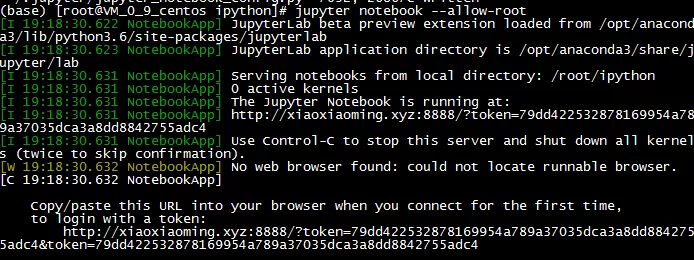
然后本地顺利访问到远程主机上的jupyter:
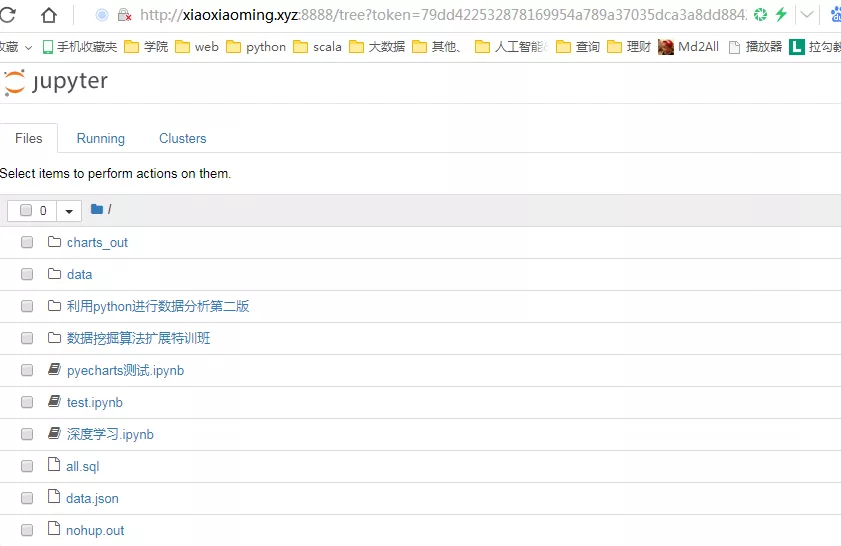
jupyter当前主目录取决于命令执行时所在的目录。
5. 配置jupyter使用密码访问
将要配置的密码使用passwd函数处理。
(base) [root@VM_0_9_centos bak]# python
Python 3.6.5 |Anaconda, Inc.| (default, Apr 29 2018, 16:14:56)
[GCC 7.2.0] on linux
Type "help", "copyright", "credits" or "license" for more information.
>>> from notebook.auth import passwd
>>> passwd()
Enter password:
Verify password:
'sha1:13c0e9e600be:b1caae19615389900ba30f072caf1c5f4dd388b1'
>>>
上面Enter password和Verify password的输入不会回想,两次输入你需要配置的密码回车,即可得到sha1码。
例如我配置的密码是123456,则sha1码是:
sha1:13c0e9e600be:b1caae19615389900ba30f072caf1c5f4dd388b1
再编辑下jupyter配置:
vi ~/.jupyter/jupyter_notebook_config.py
取消c.NotebookApp.password = ''的注释。改为:
c.NotebookApp.password = 'sha1:13c0e9e600be:b1caae19615389900ba30f072caf1c5f4dd388b1'
其他配置:
c.NotebookApp.allow_root = True : root用户下执行不需要加--allow-root参数
c.NotebookApp.open_browser = False : 启动默认不打开游览器
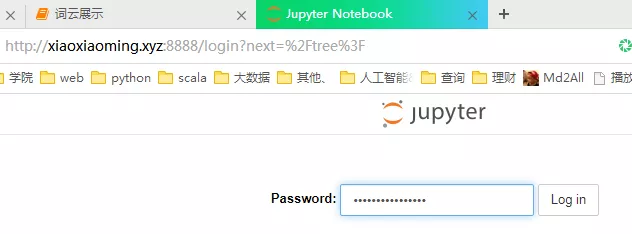
再次运行jupyter:
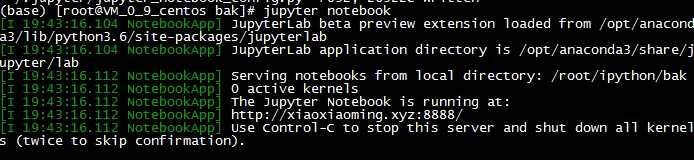
此时再访问jupyter,需要输入密码:
6. 后台运行jupyter
让jupyter即使关闭shell也后台运行。
nohup jupyter notebook > jupyter.log 2>&1 &
关闭后台运行的jupyter。
(base) [root@VM_0_9_centos bak]# ps -ef|grep jupyter
root 3646 28946 1 19:47 pts/1 00:00:00 /opt/anaconda3/bin/python /opt/anaconda3/bin/jupyter-notebook
root 3771 28946 0 19:48 pts/1 00:00:00 grep --color=auto jupyter
(base) [root@VM_0_9_centos bak]# kill 3646
(base) [root@VM_0_9_centos bak]# ps -ef|grep jupyter
root 3861 28946 0 19:48 pts/1 00:00:00 grep --color=auto jupyter