原图像:jmu.jpg(1200 X 750)

直方图
基本原理
图像直方图为反映一幅图像中各灰度级与各灰度级像素出现的频率之间的关系图。
直方图的绘制是一个统计的过程,首先得到一张图片的灰度矩阵,接着将灰度值分为若干区间,统计每个灰度区间的像素数量,最后统计完图片中的所有像素即得到该图像的直方图。
hist函数的直方图绘制原理为将得到的一维数组进行统计,同样分为若干区间(bins),统计该数组中数值位于每个区间的个数,再在坐标系中进行可视化展示。其中的一维数组即为图像的灰度矩阵转化而来,彩色图像的灰度值可根据三个通道的色值在公式 R * 299/1000 + G * 587/1000+ B * 114/1000下转化获得。
例如:
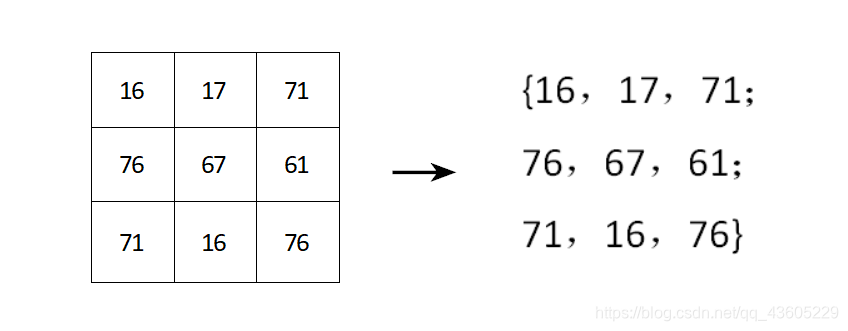
我们处理如下3X3大小初始图像,我们首先将该图片表示为二维数组,接着扁平化处理为一维数组A(可用ravel()、flatten()等函数实现)
A={16,17,71,76,67,61,71,16,76}
接着将灰度区间 [0,255] 划分为若干子区间,统计每个子区间内的像素数量,再根据要求判断是否需要进行归一化处理,最终得到所需直方图
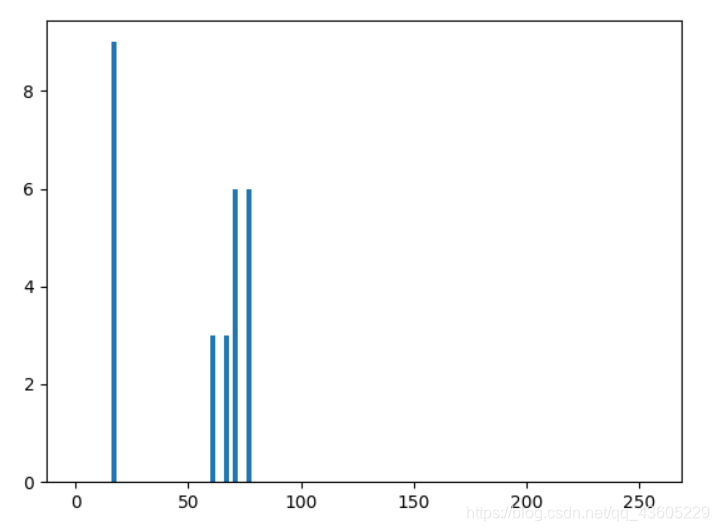
在该例中我们划分为128个子区间,每个区间包含两个灰度值,因此统计出位于区间[16,18)的像素个数为3,[60,62)像素个数为1,[66,68)像素个数为1,[70,72)像素个数为2,[76,78)像素个数为2。由于灰度值分布过于集中,因此可以进行归一化将[16,78]区间灰度变换为 [0,255],以增加图像的清晰度。通过pyplot下hist函数得到的像素数值为原来的三倍,个人理解为由于RGB三通道所致。
实现结果
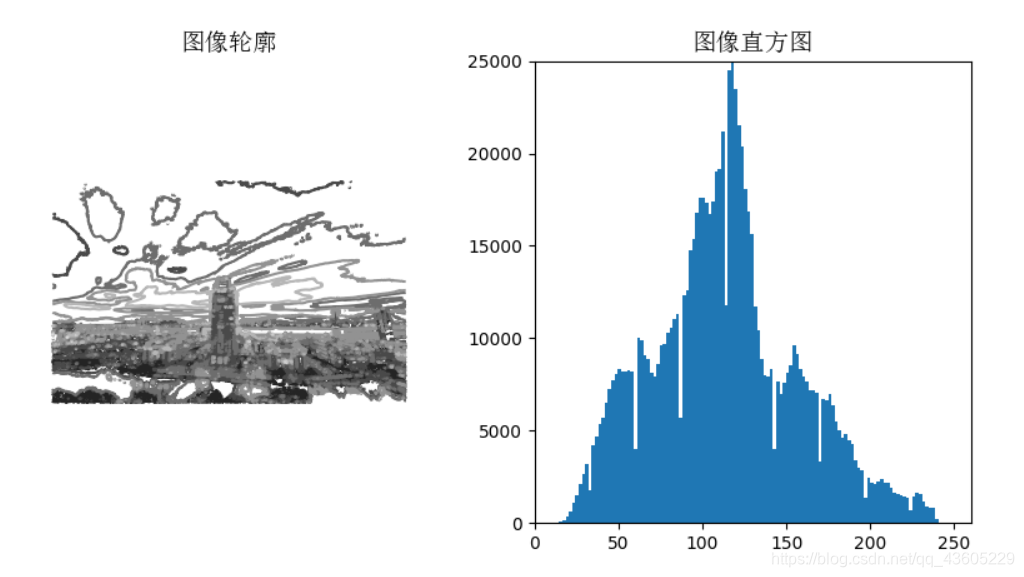
(1)调用PIL库(课本代码)
from PIL import Image
from pylab import *

from matplotlib.font_manager import FontProperties
font = FontProperties(fname=r"c:\windows\fonts\SimSun.ttc", size=14)
im = array(Image.open('C:/Users/18042/Desktop/Vision/jmu.jpg').convert('L'))

figure(1)
subplot(121)
gray()
contour(im, origin='image')
axis('equal')
axis('off')
title(u'图像轮廓', fontproperties=font)

subplot(122)
hist(im.flatten(), 128)
title(u'图像直方图', fontproperties=font)
plt.xlim([0,260])
plt.ylim([0,25000])

show()
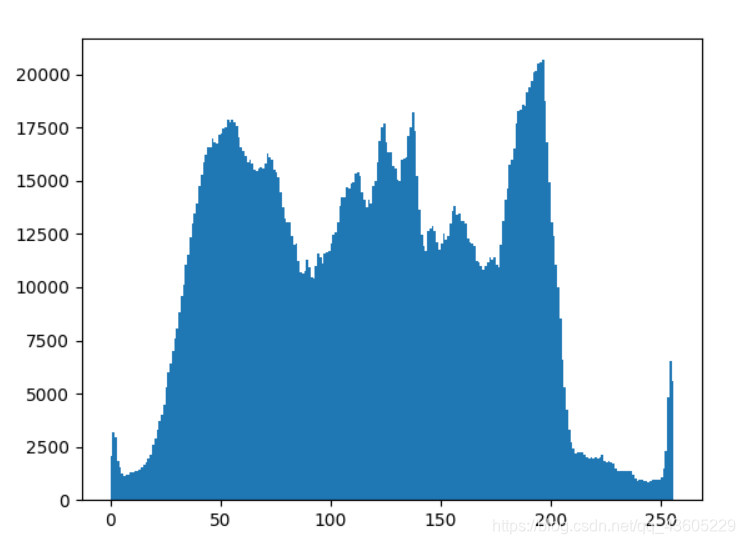
(2)调用opencv
import cv2 as cv
from matplotlib import pyplot as plt

image = cv.imread('C:/Users/18042/Desktop/Vision/jmu.jpg', 1)
plt.hist(image.ravel(), 256, [0, 256])
plt.show()
cv.waitKey(0)
cv.destroyAllWindows()
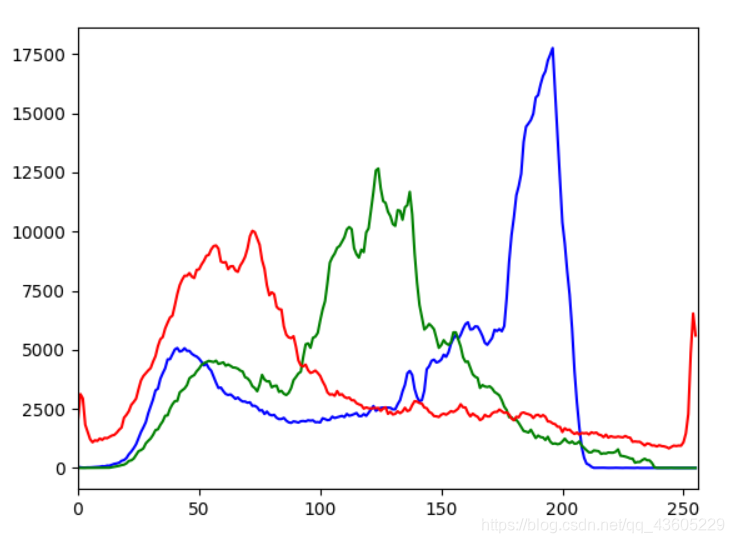
(3)RGB三通道直方图
import cv2 as cv
from matplotlib import pyplot as plt

image = cv.imread('C:/Users/18042/Desktop/Vision/jmu.jpg', 1)
color = ("blue", "green", "red")
for i, color in enumerate(color):
   hist = cv.calcHist([image], [i], None, [256], [0, 256])
   plt.plot(hist, color=color)
   plt.xlim([0, 256])
plt.show()
cv.waitKey(0)
cv.destroyAllWindows()
高斯滤波
基本原理
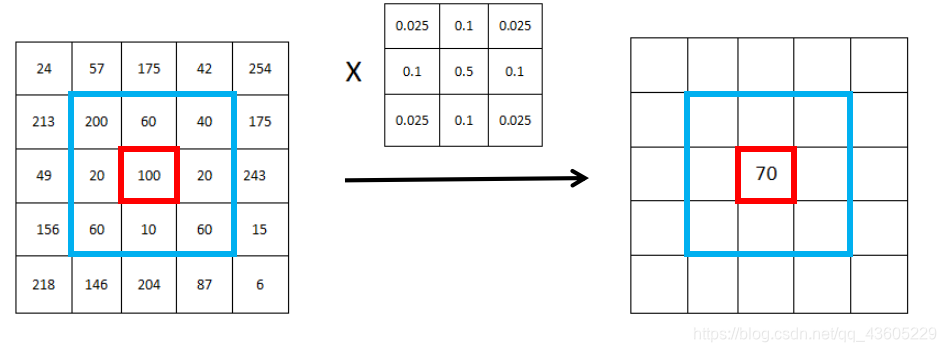
高斯滤波是一种线性平滑滤波,适用于消除高斯噪声,广泛应用于图像处理的减噪过程。通俗的讲,高斯滤波就是对整幅图像进行加权平均的过程,每一个像素点的值,都由其本身和邻域内的其他像素值经过加权平均后得到。高斯滤波的具体操作是:用一个模板(或称卷积、掩模)扫描图像中的每一个像素,用模板确定的邻域内像素的加权平均灰度值去替代模板中心像素点的值。
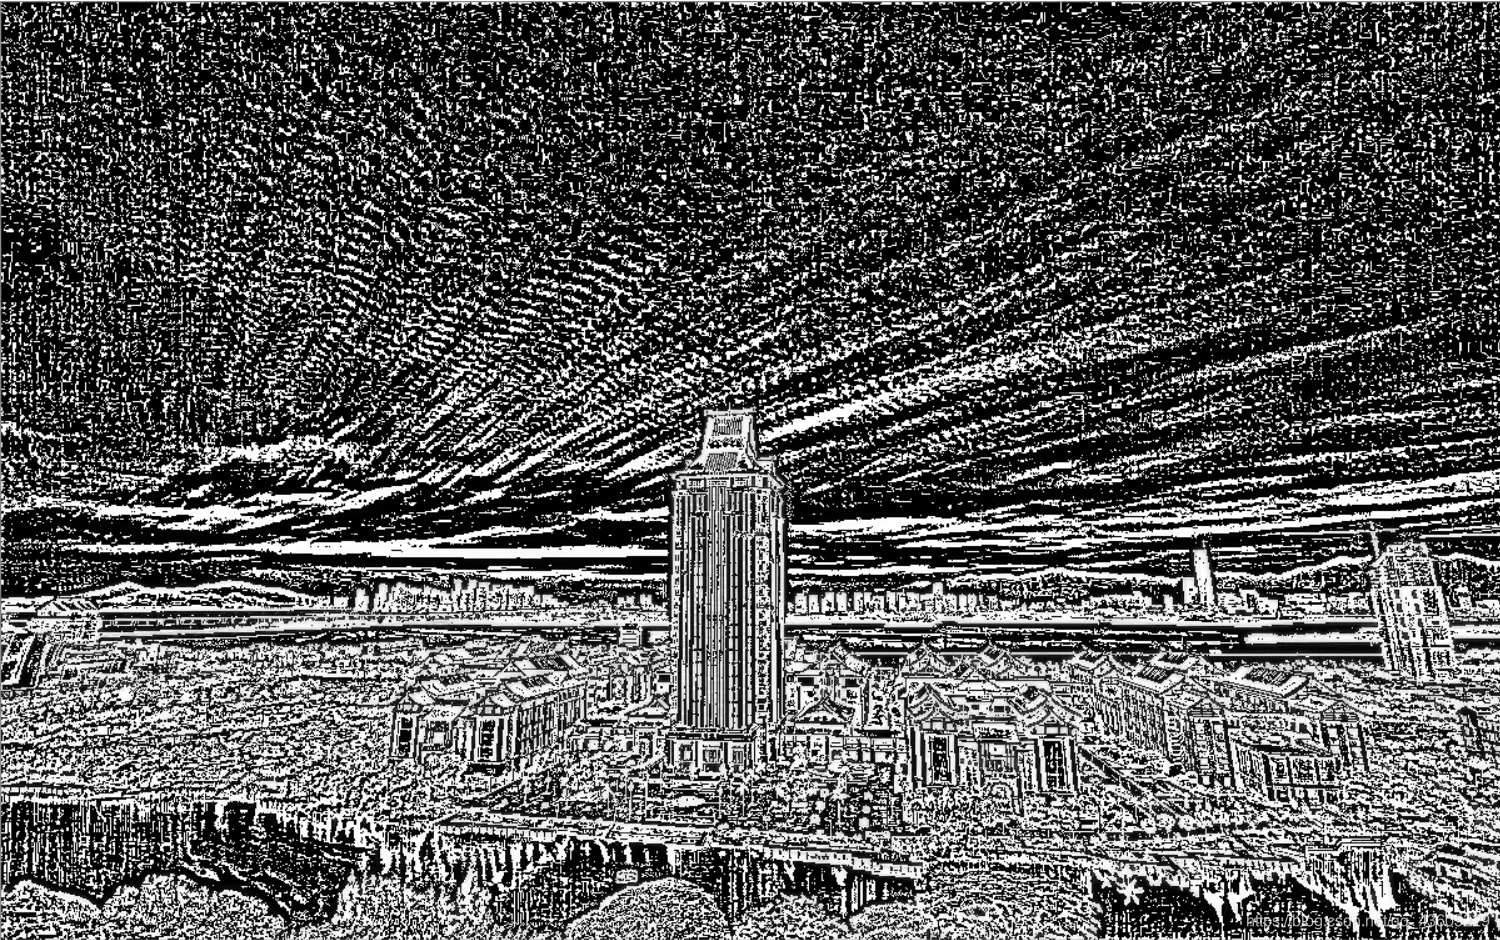
实现结果
import cv2 as cv

img = cv.imread('C:/Users/18042/Desktop/Vision/jmu.jpg',0)
blurred = cv.GaussianBlur(img,(11,11),0)
gaussImg = img - blurred
cv.imshow('Img',gaussImg)
cv.waitKey()
cv.destroyAllWindows()
