系列文章目录
使用thinkphp5.1 + Vue+axios+实现文件上传
文章目录
前言
使用thinkphp5.1 + Vue+axios+实现文件上传
一.页面代码
<!DOCTYPE html>
<html>
<head>
<meta charset="utf-8">
<title>上传Demo</title>
<style>
.fileBtn{
width: 180px;
height: 36px;
line-height: 36px;
background: skyblue;
border-radius: 5px;
display: block;
text-align: center;
color: white;
}
[v-cloak] {
display: none;
}
</style>
<script src="https://cdn.jsdelivr.net/npm/vue/dist/vue.js"></script>
<script src="https://unpkg.com/axios/dist/axios.min.js"></script>
</head>
<body>
<div id="app">
<h1 v-cloak>{
{
message}}</h1>
<form>
<input type="file" name="file" ref="file" id="file" v-on:change="upload" style="visibility: hidden;" />
<label for="file" class="fileBtn">上传</label>
</form>
</div>
</body>
</html>
<script>
var vue = new Vue({
el:'#app',
data:{
message:'文件上传',
},
methods:{
upload:function(file) {
console.log(file.target.files[0]);
var forms = new FormData()
var configs = {
headers:{
'Content-Type':'multipart/form-data;charse=UTF-8'}
};
forms.append('file',file.target.files[0]);
axios.post('http://127.0.0.1/index/index/upload', forms,configs)
.then(function (response) {
if (response.data.code == 0) {
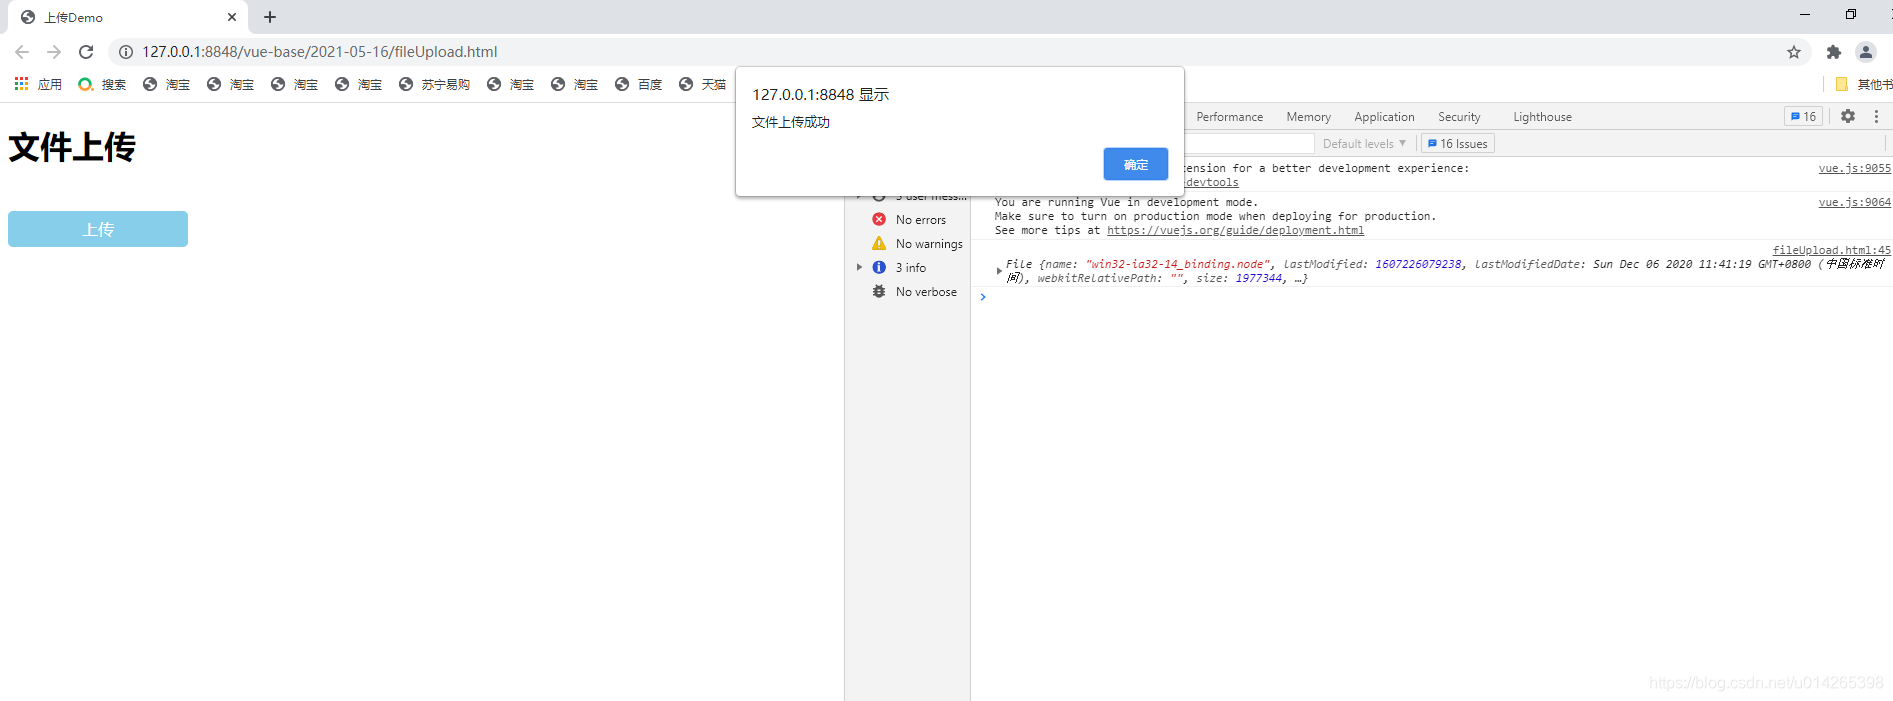
alert('文件上传成功');
} else {
alert('文件上传失败');
}
file.target.value = '';
})
.catch(function (error) {
console.log(error);
});
}
}
});
</script>
二、解决接口跨域问题
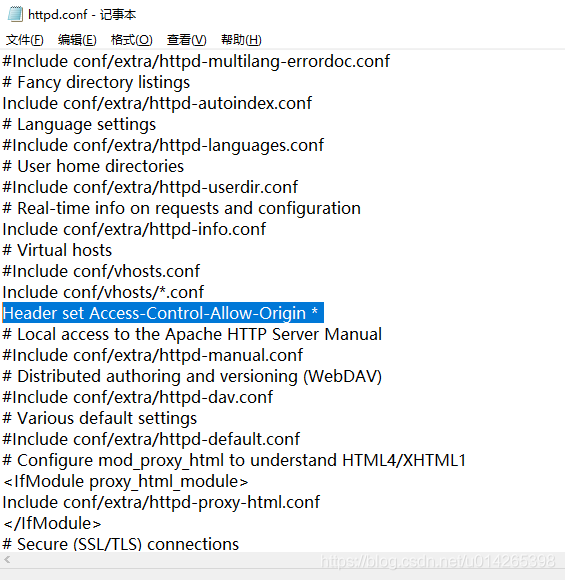
这里使用的apache 2.4.8,找到httpd.conf ,添加一行配置:
Header set Access-Control-Allow-Origin *
三.后端处理上传部分
/**
* 文件上传方法校验
*/
public function upload()
{
try{
$file = request()->file('file');
if (empty($file)) {
echo json_encode(['code' => 1,"msg" => '请选择上传文件'],JSON_UNESCAPED_UNICODE);exit;
}
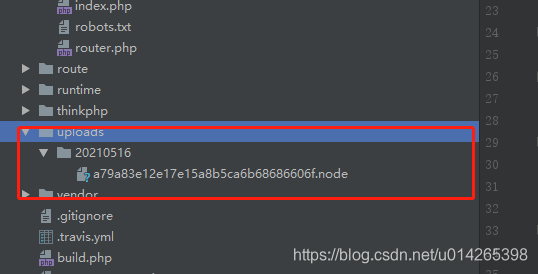
// 移动到框架应用根目录/uploads/ 目录下
$info = $file->move( '../uploads');
if($info){
// 成功上传后 获取上传信息
// 输出 jpg
echo json_encode(['code' => 0,"msg" => 'succcess'],JSON_UNESCAPED_UNICODE);exit;
}else{
// 上传失败获取错误信息
echo json_encode(['code' => 1,"msg" => 'error'],JSON_UNESCAPED_UNICODE);exit;
}
} catch (Exception $e) {
echo json_encode(['code' => 1,"msg" => 'error'],JSON_UNESCAPED_UNICODE);exit;
}
}
四.实际效果
测试成功!!!